Tweek.so : A nifty tool to manage your weekly todos

After raving about Weektodo and using it regularly, I didn’t really think I needed to switch to another app for getting my weekly to-dos in order. But when I came across tweek.so, I was convinced to reconsider my tool of choice.

Tweek.so is a minimal weekly planner and a to-do list app. Organizing your to-do list for each day of the week is such a simple concept to understand and execute. You have good visibility of what’s planned for the next week and also helps you quickly move the tasks around in case your priorities change.

Tweek.so offers a simple and clean user interface with handy tools to set reminders to tasks, add notes with basic formatting such as bullet points, quotes, bold text, hyperlinks etc. You can choose to add colors to certain notes denote important tasks.

Once the tasks are on the calender, you can click to edit them, or drag to another day to organize your work better. As your day progresses you could mark the items as complete. Unfinished tasks are moved to the next day so that you don’t forget about them. The app shows the entire week at a glance and also has another list called “Someday” for things that are on the horizon and not important right now. You can move things from the “Someday” list when the time is right.

You may ask, if all these features are pretty much the same as WeekToDo, then why do I need tweek.so? While WeekToDo maintains all data local to the computer, it helps if things are synced so that you can edit things from multiple devices without losing your work. Tweek.so allows that by signing in and syncing between devices. Another point is, while tweek.so has just one list called “Someday”, WeekTodo has a customizable number of lists so that you could group your tasks under headings like “Ideas”, “Projects” etc. WeekToDo does have an advantage in this aspect. But the best feature which works for me and drives the point home for tweek.so, is the fact that it just works in a mobile browser while WeekToDo is not yet designed for small screens. It does work in a desktop browser and has an appimage for linux os, but using tweek.so on a mobile is much more convinient so that tasks are added, edited or moved around on the go without the need to be tethered to a computer.

There you have it. With some more convinient features, tweek.so has managed to have that edge over WeekToDo. I have already jumped ship and started to use and advocate tweek.so for all my simple daily to do list and weekly planning. You should give it a try too!

Streaming Local Music from Raspberry Pi to Google Nest Mini

My experience of listening to audio files on my Raspberry Pi has been sub-par thus far. Either I have to rely on the HDMI audio out and listen to music via my in-build monitor speakers or pair my Bluetooth headphones. For some reason neither works for me. Audio output quality via monitor speakers is poor and the Bluetooth connection is also jittery making it an unpleasant experience.

I was looking for some workaround for this problem when it struck me that the Raspberry Pi must also be able to cast the music to my Google Nest mini and if somehow I can get that working, I will be able to solve the audio problem on both fronts – good quality sound and better connectivity. I found my answer in the form of a Python3 package called “catt”. catt stands for “Cast All The Things” and is a nifty Python library that allows the rendering of local files to Chromecast devices. Installing catt is just a simple command “pip install catt”. This installs catt for Python3. Once installed casting a local mp3 was even more straightforward. Just “catt cast ./localmusic.mp3” found my Nest Mini and started casting the audio to it.

The github page for catt gives enough primer to start using this utility. It has commands to scan for Chromecast devices, start/stop the casting, increase/decrease the volume, skip to next etc. “catt -h” lists out the help and describes what each option can do.

But I had something else on my mind. I wanted to build a small utility that will allow me to stream music from my local ~/Music folder and then also be able to control the catt behavior by issuing commands via a menu drive cli utility. Sure enough, I got started with that and ended up coding two scripts. One to control the menu items which allow starting/stopping of tracks, control volume, show play status etc. And another script to run the “catt cast” command to the Nest mini for playing the music. Here are the scripts and the whole thing in action.

#! /usr/bin/sh

loopplay=false
if [ $# -gt 0 ];then
	loopplay=true
fi	

musicfiles=`ls -1 ~/Music/*.mp3 2>/dev/null | wc -l `
if [ $musicfiles -eq 0 ]; then
	read -p "No music files to play. Hit enter to quit"
	exit
fi

count=1
while [ $count -le $musicfiles ]
do
	catt cast "`ls -1 ~/Music/*.mp3 | head -$count | tail -1`"
	count=`expr $count + 1`
	if [ $count -gt $musicfiles ] && [ $loopplay == true ]
	then
		count=1
	fi
done

Above script is responsible to cast the audio to Nest Mini and and capability to loop through the list of music files if required. The script to control catt behavior once the music is playing is below.

#! /usr/bin/sh

function display_menu(){
	echo CATT-UI
	echo "--------------------"
	echo 1. Play Music files
	echo 2. Play Music files in loop
	echo 3. Volume Up
	echo 4. Volume Down
	echo 5. Play next
	echo 6. Toggle Play
	echo 7. Track info 
	echo 0. Quit
}

while [ 1 ]
do
	clear
	display_menu
	read -p "Enter choice : " choice
	case $choice in
		0)	catt stop
			kill -9 `ps -ef | grep playmusic | grep -v grep | awk '{print $2}'` 2>/dev/null
			clear
			exit 0;;
		1) 	mate-terminal -e ~/.local/bin/playmusic;;
		2) 	mate-terminal -e ~/.local/bin/playmusic loop;;
		3) 	catt volumeup;;
		4) 	catt volumedown;;
		5) 	catt skip;;
		6) 	catt play_toggle;;	
		7) 	catt status
			read -p "Hit Enter to continue...";;
		*) 	echo "Not coded yet";;
	esac
done

This surely is a fun way to control the Google Nest Mini from my Raspberry Pi. Helped me achieve better audio quality and better connectivity.

Simplify Your Planning


“Think, plan and execute”. That was a wisdom gem I could pick up from my Physics teacher. He was trying to instill in us a zeal to be focused on our studies but just knowing “what” or “why” we are doing things was still not enough without knowledge of the “how”. Not all thoughts can turn into actions and not all actions can be executed without a plan. So it helps to have a plan in place to guide the “how” of the matter at hand.

How many of us have tried and failed to get a grip on planning? It’s not that we are not aware of how it’s done, but sometimes we might just loose track of things because we are not able to simplify how we manage them. Which brings me to the choice of tools that you have with you. You could use a notebook, a calendar app, a to-do list etc. I have also tried a lot of them and each has its own pros and cons. And then I stumbled upon Weektodo. They claim to be a free minimalist weekly planner and so I set out to test if this works work me.

The the main page allows to download a native application for your platform or it also provides a web version. The application is touted to be secure and maintains privacy since all the data is stored either in the app or in the browser and never leaves your machine. The interface is pretty minimal which simply organizes your tasks as a list of to-do items for the week. You can choose the number of columns that are displayed. So selecting 7 columns shows the entire week. You see a previous day, present day and five days ahead. This lays out your upcoming activities, tasks, plans which gives a handy at-a-glance view. You can plan ahead as well by selecting a future date from the calendar and mark you to-do things for that day and it will show up whenever you are in that week.

Adding items/to-do to the list is simple enough to just click on the day and add that item. In the image you can see I have some personal as well as work-related tasks which I plan to do in coming days. I can jot down basic things or annotate the details with ** to indicate priority or a time for the activity. Double click on the item allows to edit the details. Each entry has a menu button which opens a pop up window allowing you to take some notes or add sub-tasks to the item. Notes support markdown syntax which makes it easy to highlight text or add bullet lists. This is a pretty dandy feature. You can click on an item to mark it as done. You can also drag drop an item to some future date if that’s how you want to plan it. There is a “Complete All” icon. Clicking it marks all tasks for that day as done. There is also a “Postpone” icon. Clicking it simple moves all the items from that day to the next.

Besides the weekly view, the screen also has space for couple of static lists which can be used to keep track of either grocery items or some ideas or anything that can be picked up in near future. It doesn’t have to be on the calendar today, but you would like to keep an eye on it and get to it at next possible convenience.

I like the approach Weektodo is trying to bring to simplify the process of planning. It has less clutter, more function and is easy to work with. I am definitely trying my hand at this and see how well it can help me manage my planning.

Ultimate Cord Cutting Revelation With Castnow

I have long relied on the HDMI cable to play any video content off my Linux laptop onto an external monitor. But recent purchase of a device with in-built Chromecast has given me a completely different outlook towards consuming local media. Ability to “cast” content onto the Chromecast device was known to me but it is only now that I have discovered a way to play local media files to the device. You can stream videos to the Chromecast on Linux via command line. This will help me let go of the HDMI cable for good. Read on to find out more about my ultimate code cutting revelation.

The software in question is castnow which works with NodeJS and npm. Once NodeJS and npm are installed on the distro, installing castnow is just a simple command.

$ sudo npm install castnow -g

Once installed, you can start casting local as well as remote content onto the chromecast device. If you have just one chromecast device, it is automatically detected and used by castnow. For multiple devices the device name can be provided using flag –device [name of device].

Remote Streaming

$ castnow https://onlinecontent.com/video.mp4

Video format mp4 works best with castnow, but I have seen it work well with mkv and mov formats also. This has been tested with file samples available at https://filesamples.com/categories/video

Local Streaming

$ castnow /path/to/video.mp4

Local streaming also worked well for mkv and mov formats. castnow does have a flag to convert the video to mp4 as it plays. This is a also a handy thing.

$ castnow /path/to/video.avi 
Error: Load failed
$ castnow /path/to/video.avi --tomp4
State : Playing...

Streaming Music

This again is as simple as issuing the same command but for an mp3 file instead.

$> castnow https://hostedsongs.com/onlinesong.mp3
$> castnow /path/to/localsong.mp3

The help for castnow provides some more useful details and flags. Listing a few important ones here.

--address <ip>           The IP address or hostname of your Chromecast device
--subtitles <path/url>   Path or URL to an SRT or VTT file
--type <type>            Explicitly set the mime-type (e.g. "video/mp4")
--loop                   Loop over playlist, or file, forever
--shuffle                Play in random order
--recursive              List all files in directories recursively

That’s all there is to have a quick and easy “cast” option to be able to cast local as well as remote media to a chromecast device. Castnow is a nifty and an ultimate cord cutting tool. I am definitely digging it.

Rambox – My Productivity Tool box

As more and more work gets done online, we spend much of our time shifting between the tabs of the browser. Be it emails, chats or scheduling some meetings, there is an app for it all. And this could leave anyone overwhelmed with scores of tabs and managing them soon gets out of control.

This is where I found value in a unique application called Rambox. Their website mentions it as a workspace browser which allows users to manage several applications in a single place. This is a huge productivity booster. With a one shop stop for personal and professional email and several other services which I use day in and day out, I finally found something which lives upto the expectations.

What it is in a nutshell, is a clean and simple user interface where you can add tabs for various services that you use. Most of the services are for email and messaging. I opted for the Community Edition which has alomost 99+ supported apps. The installer was also available as an AppImage for Linux which made me even more excited. Gmail, Google Calendar, Duo, Hangout, Yahoo mail, WhatsApp, Outlook, Slack are just to name a few. Each service that you add shows up as a seperate tab on the user interface.

All these services and many more can be quickly setup.

I quickly setup my tabs for Gmail, Outlook, Twitter, Facebook messenger, WhatsApp and Google Calendar. The Rambox admin screen gives options to manage these services, enable/diable them or remove if required. I also configured Rambox to run at startup, so I no longer have to login into individual services to access my data. Its up and running as soon as I log in. This has worked wonders for my ability to stay on top of things and handle mutiple things simultaneously. Precisely the productivity boost I was expecting from using this app.

What makes me like this application even more, is its ability to add a custom service to its configuration. Any webpage or web application on the internet can be added as a custom service. The configuration screen allows you to configure a name of the service, its url and an icon. This allows me to add some more things that I do online and manage them all in one place.

For custom services, I was able to add my blogger account, my dropbox account etc. My digital bullet journal 2021, which essentially is nothing but a url to a label “Bujo 2021” in my google keep account, is also a candidate for my custom service setup. Another thing I could add and make use of is a permanent url to the world clock converter called WorldTimeBuddy. So a url like this shows up as a world clock tab in Rambox making it very easy to look up different time zones and schedule multi-location meetings.

This blog post was edited and posted via the WordPress account configured on my Rambox setup as a custom service. I am also thinking on lines of adding a podcast url, or some audio streaming service like spotify or pandora. If it can run in a browser tab, then it should run as a Rambox custom service as well. The possibilities are endless.

I find Rambox to be an apt tool for better productivity and it has just enough zing to keep me on top of things that I tackle on a day to day basis.

Using AppImages is just very cool

I recently started paying attention to the trend of having Linux applications packaged as a single file. The idea is so simple, distribute the Linux app as a single packaged file which runs everywhere. It is self contained and has all its dependencies within itself. Call it snaps or flatpacks or app images, all of it refers to the same thing.

Of the above names, I found AppImages to be the most user friendly approach. All you need to do is download the file, make it executable and just run it! No installation required.

chmod a+x Sample.AppImage
./Sample.AppImage

On the home page https://appimage.org/ there is a testimonial by none other than Linus Torvalds who says “This is just very cool.” Pardon me if I used that verbatim as a title for this post. But such a comment coming from Linus himself talks volumes of how simple and intuitive this idea is.

There are several resources available online which list appimages for various applications and the files are available for download. You can simply download them in one location and get on with your work without any hassles of intsallation, missing dependencies, version upgrades etc.

For better integration with application menu, it would help to add a .desktop file to ~/.local/share/applications. Here is a sample desktop file for the Etcher appimage I am using on my machine.

[Desktop Entry]
Type=Application
Encoding=UTF-8
Name=Etcher
Comment=Etcher Appimage
Exec=/home/user/Apps/Etcher.AppImage
Icon=/home/user/Apps/Etcher-icon.png
Terminal=false

This allows easy option to launch the application rather than running the app image from command prompt.

Etcher integration with Gnome

So far I have downloaded following app images and using them on regular basis.

  1. Etcher – App to flash OS images to usb drives
  2. Krita – Open source painting program
  3. SimpleNote – Easy note taking application supporting markdown and having sync ability with Android
  4. OnlyOffice – Free alternative to LibreOffice

AppImages is definitely a new way to run apps on linux. Since each app file contains its dependencies, it does not need to rely on installed libraries and runs flawlessly. Upgrades are also painless and nothing else breaks on the system. Need to uninstall an app, just delete its AppImage. I am beginning to like this approach and plan to use app images more often now. To quote Linus again “This is just very cool”.

And I Met Markdown

Recently I got myself immersed in the world of markdown. Maybe others have already been at it for years, but I thought to myself that its never too late to pick up some new skill which I could put to use in my day to day life.

So I googled up stuff to quickly understand what markdowns are all about and how this is a quick and effortless way of formatting text. Markdown is a plain text formatting syntax aimed at making writing for the internet easier. It has simple syntax for marking parts of the text as bold or italics or have headers of varying sizes as one would use in html. But markdown is non intrusive and quickly gets out of the way when its being read as plain text. After pondering over the syntax and dabbling with a quick tutorial I was ready to get my hands dirty.

I found an online editor called Hashify which allowed me to start writing basic markdown and try my hand at creating bullet lists, write some code snippets or arrange chunks of information into well formatted text. Snapshot shows hashify in action. It quickly shows the preview in the right pane and I was good to go in no time. hashify did have some limitations was I was not able to save or export my work in the comventional sense. It did allow me to bit.ly the url and share it over twitter which wasn’t to my exact taste.

That limitation was quickly resolved by switching the online editor to dellinger.io. This allowed me to export the markdown to either pdf or html which suited me perfectly. More so, it allows to sync md files with github, dropbox, google drive giving the user a range of options to choose from. I think I will settle for this as my goto online editor for markdown.

So far so good. I was still getting the hang of it, when I started thinking on ways to put this to use. The most obvious was to take effective notes. I read stuff online, new technologies or tools that will help me be a better programmer or a better tinkerer at linux. And more often than not, the hand written notes, I might have scribbled at the time, do not survive the test of time. I know I would probably never find them handy or worse they may be mistaken for trash paper and end up in the bin. With markdown, I could arrange the topic into sections, bullet points, have cross referenced urls for further reading, include images or diagrams for reference et al. The formatting would give the notes a better shape and reading them back would also be a pleasure. I could see myself making more and more notes on tech topics, saving them to dropbox or exporting to pdf for printing and later reading.

Another thought was to make a TODO list using simple markdown syntax and then strike out the items that have been completed, add information or highlight items on the list that are priority and work my way with the tasks at hand. Possibilities were just beginning to open up.

I read in some documentation “Markdown is a simple way to format text that looks great on any device. It doesn’t do anything fancy like change the font size, color, or type — just the essentials, using keyboard symbols you already know.” The thing that caught my eye is it “looks great on any device”. Which means I could edit it on a laptop and still read it just as well on my mobile. This is where I thought I should probably look into some apps which allow cross platform editing for markdown.

SimpleNote showed up on the search results and I took to liking it immediately. It provided a simple clean interface for note taking with markdown support and seamlessly synched with devices on pc, mac and linux. This gave me a perfect way to scribble markdowns on my linux laptop and then refer them on my android mobile. This would be my go to software to have my tech notes synced across devices and also have options to export them to pdf or html.

Another native app that I found for linux was Remarkable. This is again a simple approach to markdown and the app features the similar layout with preview pane on the write. It is fully featured and completely customizable. It supports GFM (Github Floavoured Markdown) and has support for tables, checklists, images etc.

With enough understanding on the topic and a bunch of effective tools under my belt, I guess I am ready to deep dive into Markdown. Primary idea would be to keep using it as an effective note taking tool and have it synced with devices so that information is always at hand. In future I might want to explore the use of markdown to generate epub or mobi so that all the tech notes are available on the ebook reader. But that’s for another post.

Quick reference
https://www.markdownguide.org/assets/book/markdown-guide.pdf
https://commonmark.org/help/
https://guides.github.com/features/mastering-markdown/
https://github.com/adam-p/markdown-here/wiki/Markdown-Cheatsheet

Pomodoro Technique For Improved Productivity

Recently I was listening to a podcast which advocated the use of pomodoro technique for better focus and improved productivity for the tasks at hand. It essentially talks about having undivided attention and zero distraction for a period of 25 minutes followed by a short 5 mins break. This completes one pomodoro cycle. The catch is it should be completely without distractions. If you were not able to focus completely then pomodoro cycle does not count. After four successful cycles you can take a well deserved long break.

I wanted to put this to test and almost immediately started looking around for a tool which will help me track my pomodoro cycle. There are application that keep track and show pop ups or notifications when a cycle ends. Here are some worthy candidates

  1. Pomidor (Paid app)
  2. Zeegaree lite
  3. Pomodoro Gnome Extension (Wasn’t useful on MATE)
  4. Tomato Timer (web page)

If you think about it, pomodoro timer in essense is just a count down timer set to 25 minutes. There is no real need to have such fancy apps. So I wanted to write some code, some quick script which will help me achieve what the above tools are trying to do.

Sure enough the answer is a simple “sleep” and “notify-send” commands which are already available on the unix shell. “sleep” takes in an argument which indicates the time duration and unit. So something like 25m implies script will sleep for 25 minutes. This followed by a simple “notify-send” invocation would indicate completion of a pomodoro cycle and that its time for a quick break. “notify-send” also takes in different parameters to be able to display better messages in the notification badge.

I went over the top and added some fancy icon and a message on the notification
sleep 25m && notify-send -u critical -t 15000 -i "/usr/share/icons/pomodoro.png" 'Hail Pomodoro Master !!' 'You deserve a break.\nSee you in 5 mins.' &

The pomodoro.png was just a thumbs up icon I wanted to use on the notifcation. It could be anything that fancies your mind. The script was placed in /usr/local/bin with appropriate permissions (755).

Next I wanted to have this as part of the start menu so that it is possible to launch it as an application rather than invoking the script from terminal. This is fairly simple task and just needs some .desktop files to be created which will launch the script.

Here are basic steps I followed to create a menu shortcut for the pomodoro script.

1. Create .desktop file
sudo nano /usr/share/applications/pomodoro.desktop

2. Add the following entry into the file
[Desktop Entry]
Version=1.0
Type=Application
Terminal=false
Icon[en_US]=/usr/share/icons/pomodoro.png
Name[en_US]=Start Pomodoro
Exec=/usr/local/bin/pomodoro
Name=Start Pomodoro
Icon=/usr/share/icons/pomodoro.png

3. Change the file permissions so that they can be invoked from the application menu.
sudo chmod 644 /usr/share/applications/pomodoro.desktop
sudo chown root:root /usr/share/applications/pomodoro.desktop

With these quick changes, I had a simple pomodoro timer and notification on my system, ready to use and help me get more focused on the work.

Screenshot showing the application menu
App-menu

Notification pop-up on completion of one cycle.
notify-send

And a handy-dandy pomodoro notifier is ready!

Audacious brings back the WinAmp Nostalgia

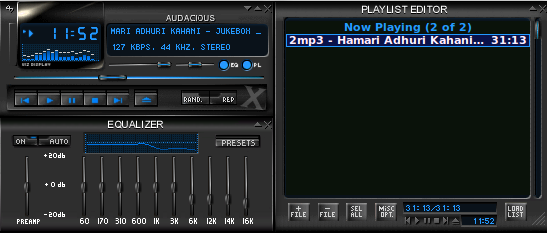
Every linux distribution has its own default music player that is bundled in the offering, but no matter which distro I install, I keep coming back to one player which I absolutely like for its simplicity. Thats Audacious for you. It is simply a no nonsense music player that will play a file, a playlist or even a folder for you. I am not a huge fan of an application which manages my music for me. I go all old school and still manage my music files as folders in my ~/Music. So all the fancy music management that comes with the likes of Bansee, Rhythmbox et al hardly strikes a chord with me. And so the simple offerings which Audacious brings with it work great for me.

Screenshot at 2016-08-07 01-09-03

Another thing that keeps bringing me back to this player is its classic winamp interface. That thing is pure nostalgia. I remember the old days when winamp used to be one of my must have softwares and I would spend loads of time trying to customize it with different skins and make it more funky. Audacious comes with some basic skins but I wanted to install some more for old times sake. And so I started finding winamp skins online which would be compatible with Audacious. Seems the unarchived format .wsz is a perfect match and works flawlessly with Audacious.

Screenshot at 2016-08-07 01-09-47

Some more googling landed me on this page which is hosting quite a number of winamp skins which I could download and install. I tried one and then another and then heck I wanted them all. So I put some scripting skills to use and build a list of wsz skins from the webpage source and ran it through the following script which downloaded them one after the other for me.

#! /bin/sh

count=1
total=`wc -l wszlist | cut -d ' ' -f 1`
while [ $count -le $total ]
do
wszfile=`head -$count wszlist | tail -1`
wszfilelink="http://qmmp.ylsoftware.com/files/skins/winamp-skins/"$wszfile
wget $wszfilelink
mv $wszfile skins/
count=`expr $count + 1`
done

All these skins just need to copied to ~/.local/share/audacious/Skins and they are ready to be selected from the settings dialog. Sharing some screenshots for the options that were now available to me when I play my music.

This slideshow requires JavaScript.


One thing which bothered me still was that the player did not have any EQ presets but the solution for this wasn’t hard to find either. Post on this forum gives precise information to add the required preset details to an eq.preset file placed in ~/.config/audacious. This file enables use of all the familiar winamp presets into Audacious.

With these simple hacks I can now enjoy my music the old school way. The nostalgia factor is just too high to even consider using any other music player to enjoy my music.

Perl Audio Converter

After a recent hop to Ubuntu MATE 16.04 and using it comfortably for quite some time, I finally hit my first snag. Seems SoundConverter has issues when converting m4a files to mp3. I use Soundconverter for batch conversions and was quite happy with the way it worked. But on Ubuntu 16.04, it seems to have issues installing the right version of gstreamer required to convert files to mp3. Attempts to install gstreamer mp3 plugin seperately also failed miserably. All said and done, I still could not use SoundConverter as intended to convert few m4a audio files to mp3 format.

While searching around for answers, I came across a blog post which advocated use of the Perl Audio Converter. It was a good alternative to the SoundConverter sans the UI. Though being a command line program, the Perl Audio Converter promised to be very versatile and easy to use.

It is available in the debian repositories and can be installed with command

sudo apt-get install pacpl

PACPL site gives some more information about their program like so – Perl Audio Converter is a tool for converting multiple audio types from one format to another. It supports AAC, AC3, AIFF, APE, AU, AVR, BONK, CAF, CDR, FAP, FLA, FLAC, IRCAM, LA, LPAC, M4A, MAT, MAT4, MAT5, MMF, MP2, MP3, MP4, MPC, MPP, NIST, OFR, OFS, OGG, PAC, PAF, PVF, RA, RAM, RAW, SD2, SF, SHN, SMP, SND, SPX, TTA, VOC, W64, WAV, WMA, and WV. It can also convert audio from the following video formats: RM, RV, ASF, DivX, MPG, MKV, MPEG, AVI, MOV, OGM, QT, VCD, SVCD, M4V, NSV, NUV, PSP, SMK, VOB, FLV, and WMV.

Looks to me that it can do pretty much everything. To convert a bunch of m4a files in a folder to mp3, I simply used the command

pacpl -t mp3 –bitrate 192 -r ./ –normalize –delete

This command will convert everything below the ./ current path and transcode every audio file (regardless of file type) into MP3 (-t mp3) at a bitrate of 192 (–bitrate 192). The -r will do this job recursively from the current directory. It will also normalize (–normalize) each file and then delete (–delete) the original source/input file.

That’s all there is to using this utility. To make things simpler I created an alias to the above command and added it to my ~/.profile file.

alias convert2mp3=”pacpl -t mp3 –bitrate 192 -r ./ –normalize –delete”

This nifty little program has made my script from this previous post obsolete. I no longer need to depend on ffmpeg or soundconverter installation for my audio format conversion needs.