Simple Tools For Managing ISO Files

When I was using Crunchbang some time back, I found it difficult to read iso files because of the lack of built in support. I was not able to work with them unless I extracted the files first. This is cumbersome when you need to work with them frequently. To get around the problem I wrote a small script to mount/umnount the iso from a preset location. I was happy to put my scripting skills to some practical use and was pretty content with the way the solution worked.

My approach now seems futile, since a rather simpler solution would be to install Furious ISO Mount from the software repository. Furious does exactly what I started out to do with my scripts. Minimal UI and no nonsense approach makes it dead simple to use.

Screenshot from 2014-11-29 09:03:56

Just select the iso you want to work with and click Mount. It lists the location where the iso is mounted and has options to burn the iso or unmount the image when done with it. Thats as easy as it can get.

But seems even this is too much effort. In elementary OS, I discovered how easy it is to mount iso files and work with them effortlessly. Archive Mounter, which came preinstalled with elementary, can handle this very well. Set it as default application to open iso files and let it mount iso files rather than open their contents with the archive manager everytime. Mounted files appear on the left panel where you can access them just as you access dvd or usb files. After use unmount the iso by clicking the button on the interface. As simple as that.

Screenshot from 2014-11-29 10:02:55

Now for a quick look at ways to create iso files. Rather than hunting for some killer software to convert my dvds to iso files, it was the command line to the rescue. dd command in Linux faithfully converts the contents of the dvd to iso file.

koolksp@koolksp-3000-N100:/media$ dd if=/dev/cdrom of=~/filename.iso
15553408+0 records in
15553408+0 records out
7963344896 bytes (8.0 GB) copied, 2059.29 s, 3.9 MB/s
koolksp@koolksp-3000-N100:/media$

You can also create iso files from directories off your hard disk with help of mkisofs command. Simply use it like so to create iso file from the contents of the directory you are in and let it work its magic.

koolksp@koolksp-3000-N100:~/Pictures$ mkisofs -o filename.iso .
...
83.71% done, estimate finish Sat Nov 29 09:47:57 2014
90.69% done, estimate finish Sat Nov 29 09:47:59 2014
97.66% done, estimate finish Sat Nov 29 09:47:59 2014
Total translation table size: 0
Total rockridge attributes bytes: 0
Total directory bytes: 0
Path table size(bytes): 10
Max brk space used 0
71681 extents written (140 MB)
koolksp@koolksp-3000-N100:~/Pictures$

Both dd and mkisofs come installed as part of most Linux installations and will be available for ready use. These tools are simple and effective when it comes to working with ISO files.

IntelliJ Idea’s Git Integration Makes It Simpler Than Ever

Since the last post on Git, I have been making myself familiar with UI tools which will make the job mush easier. git command line is powerful no doubt, but when working on some project or within an IDE, it sometimes may become cumbersome to keep switching between your work and the terminal to check the changes in. I also came across some git UI clients like gitk, gitg but somewhere the functionality didnt seem complete and cli still reigned supreme. I was looking for a really simple way to get more productive with git without the hassles of going back and forth on the terminal.

The answer was right in front of me. IntelliJ Idea, the Java IDE I chose to install on my machine already has an excellent integration with git. And all I had to do was make myself more familiar with how to use it while working. In fact I would say that with git integration that Idea provides, no one would ever be hesitant to quickly embrace git in their daily coding routine.

To illustrate this, let me start with some dummy project. GitDemo is what I have named it and started adding some code (Hello World it is!) to the project. This is still just a simple project and I havent used git so far. Action begins the moment we add this project to git by initializing the git repo. git init is the cli command, but on IDEA interface this is as simple as selecting the opton from the menu. VCS >> Import into Version Control >> Create Git repository as illustrated in the screen shot below. This will prompt for confirming the directory location for creating the git repo. This selected directory ( the root for our project ) will house the .git folder and wala! our git repo is initialized.

Screenshot from 2014-11-22 13:28:47

Screenshot from 2014-11-22 13:33:44

After initilizing the repo, you carry on as usual and add the root directory to gits staging. This is also available at right click of the mouse. Select project root, right click and select Git and then select Commit directory. This will open up a dialog box to select and commit several files in one go to the local git repo.

Screenshot from 2014-11-22 13:30:10

Check the change history on Idea.

initial-commit history

Lets say we have to branch the master to a new branch for adding some new feature, the cli would be a simple git branch -b new_feature. Via UI, we would do the same thing but finding the Branches Menu under git. This is available on via the VCS menu as well. It asks for a new branch name, create that branch and switch to it as well.

create branch menu

new branch name

Let say we add some more code, on the branch of course and commit it. The changes are still in the new branch and not on master.

Switching back to master will show us that the code on master is indeed older and probably we need to merge the new changes back onto master.

We will do this through a series of steps.
1) Adding new code to branch and commit it

commit on branch

2) Checking out master by selecting it from the list of branches available on the repo. Note that revision history on master is still old. It does not have the feature change we made to the branch.

cehck-out-master

changes not on master yet

3) Merge the feature branch into main.

merge branch to master

select branch to merge

After merging changes to master, we can go ahead and delete the branch that we just created. The only care to be taken here is checkout master and then attempt to delete the feature branch. You will not be able to delete a branch that you are already working in.

delete prev branch

Git UI within Idea has been dead simple so far. Sometimes it complains that it did not find any changes to commit etc. The remedy for that is to use the Synchonise project option on the menu. This refreshes the list and new files that are eligible for commit are now visible.

All said and done, we are at a position now where we can push our changes to a remote repo on github where we can share the project with others. Under the Git Repository menu, we have an option of ‘VCS Push’. It simply means that the current changes in the local git repo need to be pushed to remote. The UI however does not list any remote location. We need to create one and add it to git for this option to work.

push no remote

Creating repository on github.com is simple. If you have a registered account, login and select “New Repository” from the github inteface.

github-repo-create-2

create github repo

Once created, github also provides a set of commands that we can use to add this remote repo to our git config.
git remote add origin https://github.com/koolksp/gitdemo.git is the command of interest here, and needs to be executed on the terminal to add the new git repo as remote. This feature isnt yet available on UI and seems to be the only time when I had to visit the terminal.

After adding the remote url, the option for ‘VCS Push’ shows the outgoing changes and after a successful push we can observe these on github as well.

push origin master

see code on github

see code history on github

And that is how we are quickly through with a simple git enabled project, where we could create repository, branch and merge code for required feature changes and push the final codebase to github by adding a remote repo.

If someone else needed to work with this code now, they would have to clone the url and get started with it! Idea also has option where you can clone an existing git url rather than starting on an empty project. Go ahead give it a try!

My aim here was to get productive as quickly as possible with a new setup of git and IntelliJ Idea. And try and use git via the ui tools rather than cli at the terminal. Either ways getting to know git better makes me more comfortable with it and confident that I can start using it full time with some live project soon.

The Distro Retrospective

If you are as interested in following the latest distros that are relased every now and then as me, you know that distrowatch.com is the place to go for the latest news on the topic.

They also have a stats table where you can watch the popularity of your favorite distros in terms of ranking based on the hits per day. So if you find that the distro you use is higher on the list, it sure means that it in trending on distrowatch and more and more people are probably already adopting it. Here you will also find names that you’d seldom hear. Thats how vast and diverse the linux distro landscape is.

I had a quick look at the top 20 in the list and just pondered on how long I have known it or used it. Just sharing here some quick statements that come to mind when I read these names.

Name of the Distro My lay man views on it
Mint Excellent choice for new users. If only cinnamon had not troubled me much, I would have still stuck with this immensely popular distro.
Ubuntu Unity single-handedly ruined it for me. Nevertheless, it is the base on which other distros are largely based. So if you are using an Ubuntu based distro you can thank them all you like. Just that probably you dont share the same enthusiasm for Unity.
Debian The grand daddy of all things debian. Even Ubuntu owes its stable packages to Debian. Rock steady and truely realiable. I havent worked on pure Debian installation yet, but always used it in some derivative form.
openSUSE This definitely deserves more attention than what I have given it. Maybe some day when I have an uber modern machine and gnome3 works like wonder on it. For now I seem stuck with low powered laptops which may not work well with openSUSE.
Mageia This Mandriva fork is something which I have never tried. Maybe I just dont have the heart for humongous 3.5GB iso download.
Fedora I was recommened Fedora as the ultimate developers machine and for its cutting edge software. But having used debian based systems for long, I have always hesitated to move to rpm based system. Plus initial rendezvous with Fedora hasnt worked its charm on me.
CentOS This is a free version of enterprise RHEL. Distrowatch says "CentOS is for people who need an enterprise class operating system stability without the cost of certification and support". Well, I dont think I belong to that elite group yet. So have been steering clear of this one.
Arch Its not for the faint hearted and many pros find it difficult to get things installed. Arch needs to be build from source and is a good distro to learn Linux internals, but as a hobbyist I havent found reason to dig that deep. Arch is not for me for now.
Zorin This windows clone (almost) is aimed to make it easy for new comers to change over to linux. Honestly I never liked the over all look of Zorin. Trying this is on a back burner for me.
elementary Current distro for me and also the one to give the most fantastic user experience. I would recommend elementary to anyone who wants a functional, user friendly and eye pleasing distro. Eagerly waiting for next installment Freya to be available.
LXLE This lightweight distro saved my laptop from becoming a piece of junk. Although openbox does feel rudimentary and can't really compare it with what elementary gives in terms of UI, LXLE is fun to work with. The most interesting thing about it is the sheer list of pre installed apps that come with it. If you set it up on a beast of a machine, it is ready for productive use from day one.
Kali This distro is build for a specific purpose. Penetration testing. I will have to learn a bit more about it before I can justify its use. A strict NO for now.
Puppy Been using Puppy and its several avatars but mainly as a rescue disk. Its minial setup and lack of programs makes it less suitable for full fledged desktop replacement. But as a rescue disk, I absolutely dig it.
Lubuntu Having used LXLE which is based on Lubuntu, I think I can tick this one as well. Its lightweight and fast. Though the eyecandy needs some work. Would recommend LXLE over this any day.
Android-x86 Believe it or not, but I ran this x86 emulation off the live disk to quench my curiosity. Once into the live session, I just could not justify its use on a laptop thats does not have touch screen, and using android with mouse support kind of kills the experience. Its still high on the distro watch list. Sure others must be finding cool uses for it.
Free BSD This has recently caught me attention. Maybe I can give it a try. Seems difficult though since I am already hooked onto elementary.
Deepin Excellent UI, very refreshing take on control panel and custom softwares. If only I could get this working on my machine. I will return to it again to try my luck.
Bodhi I hung onto Bodhi for a while, considering my requirements for a lightweight distro. Also E17 was something new and interesting. But the interest did not sustain for long. The bare minimum setup hardly comes with any useful stuff. It could take cues from other distros which aim to be more productive by a thoughtful selection of applications.
PCLinuxOS Yet another Mandriva fork. Havent read much about this and as such I am pretty ignorant towards it.
Manjaro I feel this is the one, which will fulfill my idea of a rolling release distro. Its openbox version is as close to crunchbang as it can get. But yea I would have to be bored to death with elementary to even start considering this one. Sorry Manjaro, not now at least.

It makes me sad not to see Crunchbang or Xubuntu listed in the top 20. They do make it to the 22nd and 26th place though. Even good ones that I have used like SolydX, Semplice do not make it that high on distrowatch’s popularity index. Maybe its just the competitive nature of the distro releases. And if for some reason a distro’s popularity takes off, it will jump up higher and higher on this table, leaving other notable ones behind. The crux of all this is the wide range of choice a user is presented with. As long as you have that freedom to choose and configure and tweak some distro to your best liking, I think the linux community has done its job.

Yes my distro hopping seems to have halted with elementary, and when I glance back at this list, there are few ones that I would really be interested in jumping onto. But you never know. A latest and greatest version for some killer distro might just be round the corner. And distrowatch is just the place to keep an eye on it!

Git it!

No sooner have you started with your project and the code starts to grow beyond the basic skeleton of folder structures, you come across the need to do some version control for your source code. Rudimentary approach of making backup folders by date or patch files has its fair share of issues when it comes to maintaining the code or going back to specific change you made a week back, while retaining much of the latest changes. Version control gives you a finer control over things, you can keep adding changes to files that you have and the version control tool will give you ability to go back and revert changes whenever required. Most people are familiar with Subversion as an excellent tool for version control and I am sure they all have heard of Git as well, but havent really moved on to it for vairous reasons.

Git has become wildly popular as the tool for version control. It is the brain child of Linus Torvalds and the fact that it is currently used to version contol the linux kernel, which is probably millions of lines of code and the biggest open source project of its kind, speaks leaps and bounds about the capability of Git. It is largely command line driven but several good (and free) clients are also availabe for you to try. It differs from Subversion in the fact that it is a distributed version control system, as against the single server model of svn. At any given time, the git repo on a single machine is all you will ever need to work with the source. These changes can later be moved to , merged into or pushed to other code repositories as and when they are available. So to continue with some work, you need not rely on any central location for making the latest code available to you. Thats sweet!

I have always been a Subversion user, primarily because work never demanded switching to Git ever. So the only option was to start using it with some pet project and understand how it works, how it differs from svn etc.

Over time I think I have a better understanding of git. One can learn it by drawing some parallels between git and svn, but that only creates more confusion since the idea is to understand git as a distributed version control and by comparing it with svn, we kind of miss that point.

Initializing a git repository
There are three ways of achieving this. One is to initialize a new git repository (repo for short) in whatever folder you are in and start maintaining code in there. Second is to clone git code from some local folder that already houses a git repo. Third is to clone git repo from sevaral public git urls hosted on github. This is a location where projects are hosted in public domain and people can collaborate by cloning the repo, contributing their changes and pushing the change back to public repo.

git init - Creates a git repo in current directory.

git clone /path/to/project - clones existing project and starts git repo in current directory

git clone [git-url] - clones a publicly hosted project onto local disk. creates a directory of the same name as the project

Starting to use git
Once the git repo is created, you can carry on with work as usual and then check in the code when done. The key difference here (from svn) is git has a two step commit process. It has a staging area and the actual commited code which are treated as separate things. So for some change to be commited, it has to be added to stage first. Adding to stage simply means git is now tracking those files for change. Files that are not in stage are not tracked and wont make it to repo on commit. git provides simple commands to add, check and commit the changes. In case you missout something during an initial commit, git’s commit command also has an amend flag which will make your change as part of last check in.

Git has branch names for code that you are working with. The default is the “master”, something similar to trunk in svn. You will be able to create new branches and name them as per your convinience. We will see this later.

git status - lists files that have changed since last commit or ones which haven't yet been added to stage

git add [ filename | file1 file2 file3 | *.txt | * ] - start tracking files, use multiple file names or wildcards to add more than one file at a time

git commit -m "message" - commit the changes to current branch. "master" in this case. and add a message for the commit

git commit --amend - Commit this change as part of last check in. This can be used to change comment description, add missed out code etc.

git show - shows files that were checked in the last commit

git show --name-only - will list just the file names and leave out other details.

Before commit, it is usually better to add some config information to git repo. This identifies you by a username and email and this info is added to every commit that you do.

git config --global user.name "Your Name"

git config --global user.email you@yourmail.com

Note that this commit is only on the local master, and is good only if you are the only user of the codebase. If this needs to be shared with others, it has to be send out to remote repository. For this simply add a remote repo to current git setup and push code to external url.

git remote add [remote-name] [git-url] - This adds a repo url identified by the given name

git fetch [remote-name] - fetches all code from the remote location to current directory.

git push [remote-name] master - pushes all local changes in master to the remote repo identified by given name

Branching and Merging
As with other version control tools, you may need to branch out existing code to try out experimental code or add some feature to see how it integrates with rest of the project. git has branches for this. git also allows you to switch between branches, so that the directory in which you are working currently shows only the code which belongs to the branch you are working on. If you switch the branch half way, the changes you made a while back are no longer vsible since you are on a separate branch now. The changes, if committed, will still be on the other branch, so dont worry about it. “branch” command lists all branches in current repo. The default branch is master. You can switch to a different branch using “checkout”. Merging is also simple enough. It merges changes from the mentioned branches into current branch. If all goes well, you have the changes in current branch. The other branch can be removed if no longer used

git branch - lists all branches in the current repo

git branch [branchname] - creates a new branch of given name from current branch

git checkout [branchname] - swicth to branch of given name

git branch -b [branchname] - shortcut command for creating a new branch and switching to it as well

git merge [branchname] - merge contents of given branch into current branch. For this you have to be outside the branch you want to merge. If you try to merge a branch onto itself, git wont complain. It will only say that the branch is "Already up-to-date."

Tagging
So we have done a lot of work and changes on current code and current state of the project is good enough to push out a alpha build say. git provides a way to tag the code base for furture reference.

git tag [tagname] [commit id]

commit id is maintained in the git log, which we can refer for entire list of changes done on the project so far. git will tag code changes identified by the commit id.

Using git in a team
All git commands seen so far work well if you are the only one working on the code. What if you and another friend are collaborating on the project and need to be aware of the code changes made by each other. This is where you need to understand gits way of working with distribute code. git allows you to pull changes from a location and push changes out.

git pull [remote-repo] - gets latest code from the origin (the public git location)

git push [remote-repo] master - pushes code changes from master branch to origin (share changes with other) This is possible after adding a remote repo to your project as we have seen in earlier section.

Once you have latest code with you and start making changes, but need to discard your changes and replace them with the ones on the repo, git can either checkout the individual file again and thereby replace the local copy, or fetch everything from the origin branch and revert all local changes in one go. Be careful when using these options.

So far so good. Feel like a Git Pro already? Things can be confusing, so I made myself some easy to follow charts outlining different git commands that I’d use when working on different scenarios in a project. Apart from the usual commit and reverting of changes, we also have to deal with branching and merging and pushing code to public repo. These small (hastily made) charts will help keep things in perspective. A picture does speak more than a thousand words.

Simple git Initialization
git_init

Clone a project and work on it
git_clone

Revert some local changes
git_revert_local_changes

Basic branch and merge
git_merge

Tag version of the project
git_tag

In course of learning new things about Git, I stumbled upon some excellent reference materials which are worth mentioning here. Further study of these resources will help gain a better understanding of Git. The book “Pro Git” is definitely on my reading list.

1) http://rogerdudler.github.io/git-guide/ – A much better guide than this article
2) http://gitref.org/ – A good reference guide by the GitHub team
3) http://git-scm.com/book/en/v2 – The Pro Git book

There are couple UI tools to work with git as well. I havent started using those yet, as I still need to make myself comfortable with git command line. Maybe a post for Git UI clients can soon follow. For now, hope this quick guide to Git helps understand the concepts and basic usage!

“Super” screwup

Recently I was checking the possibility of having shared folders between different users on my laptop, some common way to drop files into a folder and let the other user pick them up for use. The idea was simple enough and I also found sufficient details on forums explaining how this can be done. But I must have screwed up the commands or permissions on the files somehow.

“sudo visudo” is the culprit command I think. Because after messing with the sudoers file, I have managed to remove my only account from the sudoers list. So now there is no Admin account on my laptop and no other user with “sudo” access.

koolksp@koolksp-3000-N100:~$ sudo visudo
[sudo] password for koolksp:
koolksp is not in the sudoers file. This incident will be reported.
koolksp@koolksp-3000-N100:~$

This is affecting my users permissions to install/remove any software, change any system level settings and so on. So much so, that without root access I cannot add myself to the sudoers list. I dont think I am aware of the root password as well, because I had setup my user as the only one on the system with root access and now ironically that access is gone.

koolksp@koolksp-3000-N100:~$ su
Password:
su: Authentication failure
koolksp@koolksp-3000-N100:~$

Apparently I will need sudo access to restore my sudo access! Pondering on options to get out of this soup. “super” screw up indeed.

SOLVED : It took some time scanning online forums, but finally got an answer to this.

You cant execute sudo without having your username in the sudoers list. Thats a given. Which means if you dont have sudo rights and are not root user of the system, there’s not much you can do.

But the solution I stumbled upon is to use a live cd to boot into such a system and attempt to edit /etc/sudoers file as root and add the required username to it.

The way this works is, the root user of the live cd doesnt have any password set. So once booted into my laptop with elementary os’s live cd, I could change user to root by using sudo -i

With this, I could mount my host’s root directory and edit the /etc/sudoers file as root user. Mind you, attempting to edit /etc/sudoers using visudo will only change the list for the live session and isn’t what we are looking for. The correct file to edit is /<mount-point>/etc/sudoers. In my case, I found it under /media/

Added the following line at the end of the file to grant my user sudo rights.

koolksp ALL=(ALL) ALL

This is also a good oportunity to have another user added here for contingency sake.

Saved the file and rebooted the machine. Sure enough I was able to execute sudo command, but gui applications like the synaptic manager or the settings tool weren’t able to log me in, to change any settings or install software.

Apparent reason for this was that my user koolksp was still not part of the “sudo” group, which is required to grant access when using gui apps.

I could change this by command sudo usermod -G sudo koolksp which adds a sudo group to my secondary groups list. Verify this by issuing groups command.

Note that on the ubuntu platform and its derivatives, the admin group no longer exists. It has been moved to sudo now.

With the last change, I was now part of the sudoers list as well as the sudo group, which allows me to make system wide changes and install/remove softwares. After some effort, my sudo priviledges are back on track.

As a caution, I am adding another user from my system to the sudo group, so in case I find myself in this soup again, the other user with intact sudo access can rescue the situation.

LXLE : Boon for an aging laptop

I also own a Toshiba Sattelite L30 laptop. It has had its good run and now the hardware is noticeably older and cant really match upto the requirements of more recent operating systems. I cant imagine it to handle anything more recent than Windows XP, which itself has reached its end of life. Does that mean I cant put this old beast to any good use? Absolutely not! I looked around for the best fit OS for this machine and seems that my prayers are answered in form of LXLE.

LXLE, short for Lubuntu eXtra Life Extension, is a nifty thing sporting a lxde desktop and promises to be ultra light on resources. Thus making it ideal for older hardware. I have never used the lxde desktop and first impressions werent much. It is just another distro was all I thought until I started using it and the list of softwares that already bundled with it makes it ideal for usage right out of the box.

For first time I have actually noticed games bundled with a distro. And LXLE seems to have a long list of them to keep occupied when free. The graphics apps include GIMP, Shotwell and quick utilities for scanning and image viewing. For audio and video, we have apps like minitube, totem movie player, a screen capture utility, openshot video editor. The preinstalled audio program wasnt something I was comfortable with. I promptly installed Audacious on it.

Some more bundled programs were Firefox, FileZilla, Transmission client, Pidgin messenger, Uget download manager and the list would go on. I was struck by the thoughtful inclusion of so many programs in a distro.

I spent some more time looking around the system. It has some hundred assorted wallpapers and also a small utility to put up a random wallpaper at click of a button. Thats thoughtful.

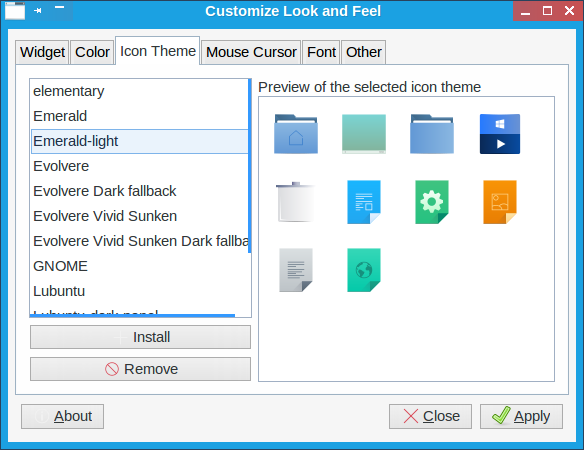
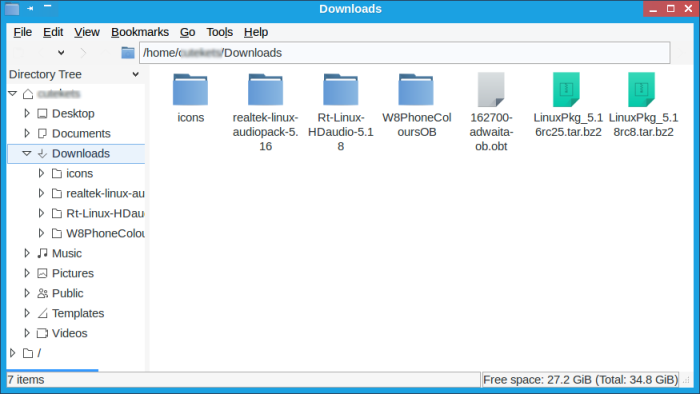
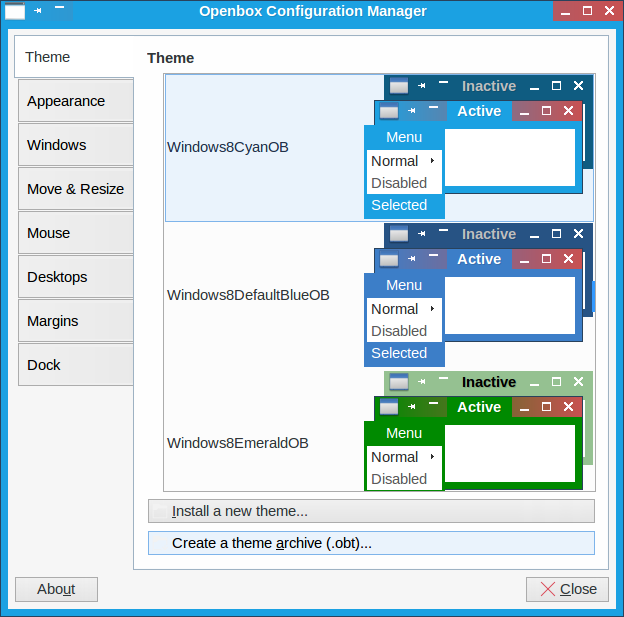
Openbox is the windows manager for LXLE as well. As usual its bland and uninspiring. I started looking around for some good themes and icons options so that I could add some eye candy to the desktop. A few quick searches on box-look.org and gnome-look.org, i settled for the Windows8 open box theme and few set of flat icons.

Screenshot from 2014-11-03 23:28:08

Screenshot from 2014-11-03 23:30:17

The Emerald icons give a sleek look to the setup. Other noticeable ones are Square-Beam and Ultra Flat icons. Quick seach on gnome-look.org should get you there.

Screenshot from 2014-11-03 23:29:18

Find this Windows8 Openbox theme here

Screenshot from 2014-11-03 23:33:02

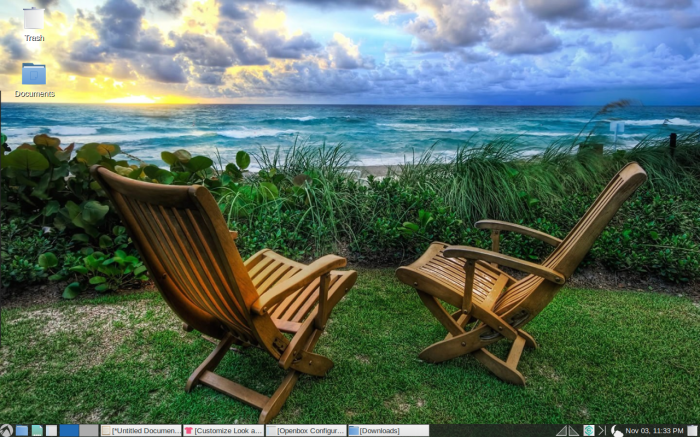
The Desktop is minimal and functional with task bar and a side panel to launch frequently used application.

All in all, I am impressed with how this has transformed my old laptop and made it more functional. The list of pre installed apps makes it dead simple to use out of box. Performance on older hardware is good but this thing would definitely fly on a newer machine with more modern hardware.

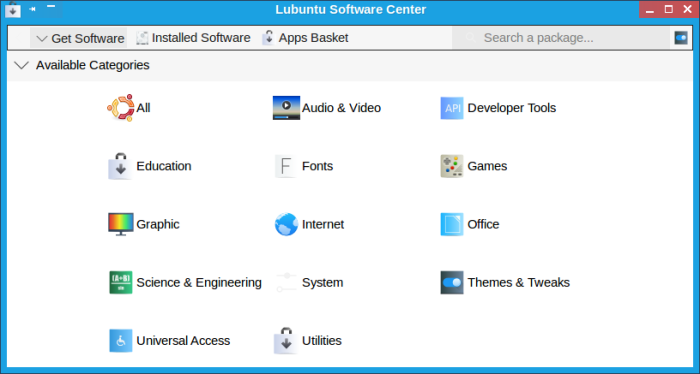
For all additional software needs just jump to the Lubuntu Software center to find your favorite apps and get going with LXLE!!

Screenshot from 2014-11-04 10:28:07

The only thing I havent able to get working is the sound, but that too is a hardware issue. Audio on Toshiba L30 laptops is poorly supported in Linux. Attempts to install new alsa drivers from source have failed. I followed some online forums for any sensible solution but have managed to get headphones working, that too with very low sound. All tweaks to get the speakers working have flopped so far.

But I guess I can live with it. This isnt going to be my primary machine and so its alright if sound doesnt work. But other things like wifi and mouse trackpad work perfectly. This L30 has sprung to life once again and will cater to all day to day basic computing needs. Thats all that counts!